How to Transfer BAI Using the Balance AI Dashboard
Before starting, ensure that you are using the correct network. Select the Mainnet or Testnet according to your needs.
Mainnet
https://dashboard.balanceai.network
Testnet
Please contact us on Discord for access to testing features
Important Notes
Before starting the process, If you need a wallet, read this sections where we recommend the Polkadot.js extension:
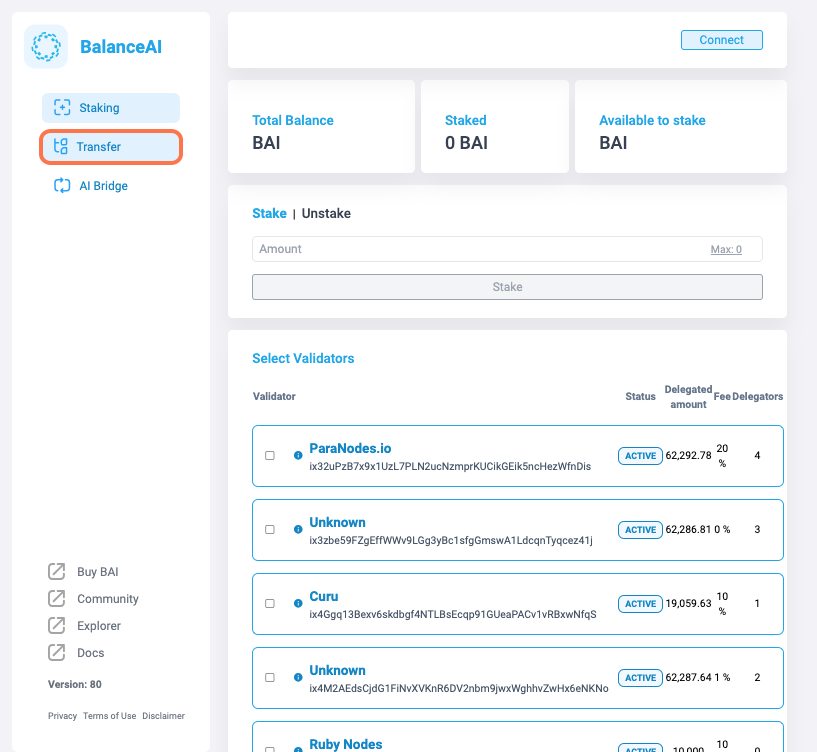
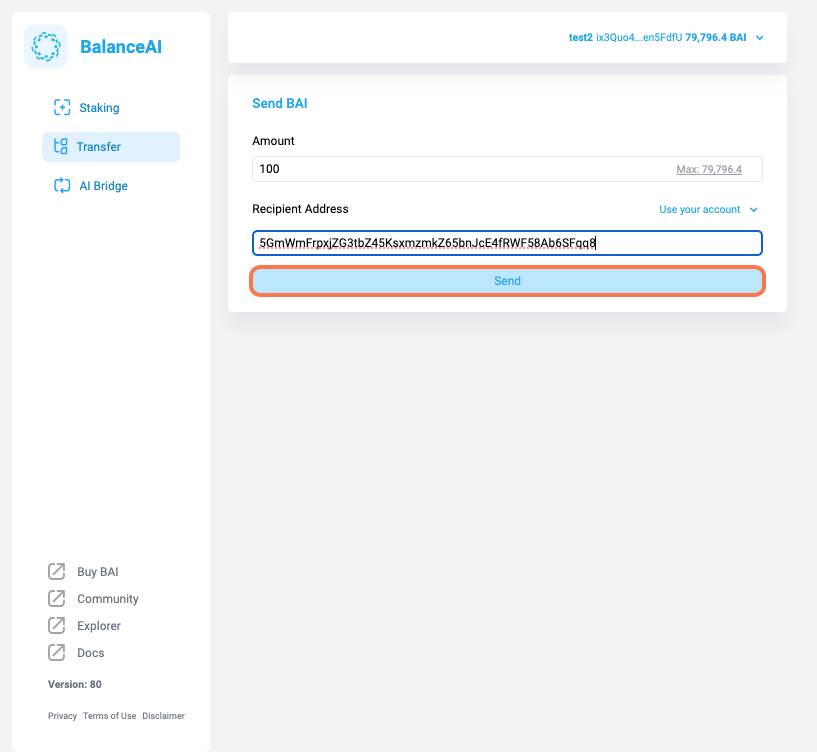
1. Click on "Transfer"
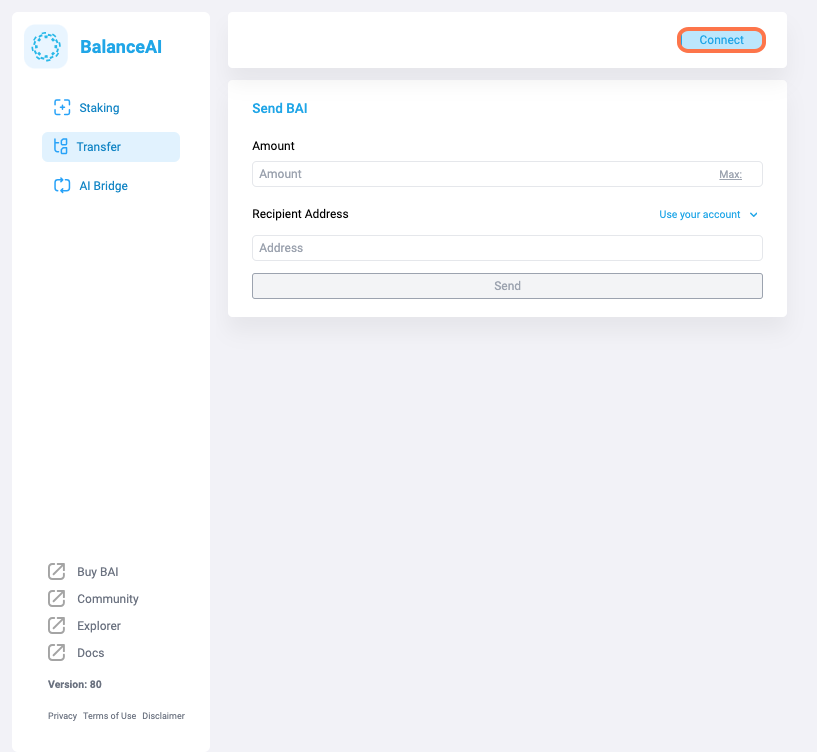
2. Click on "Connect" to connect your wallet
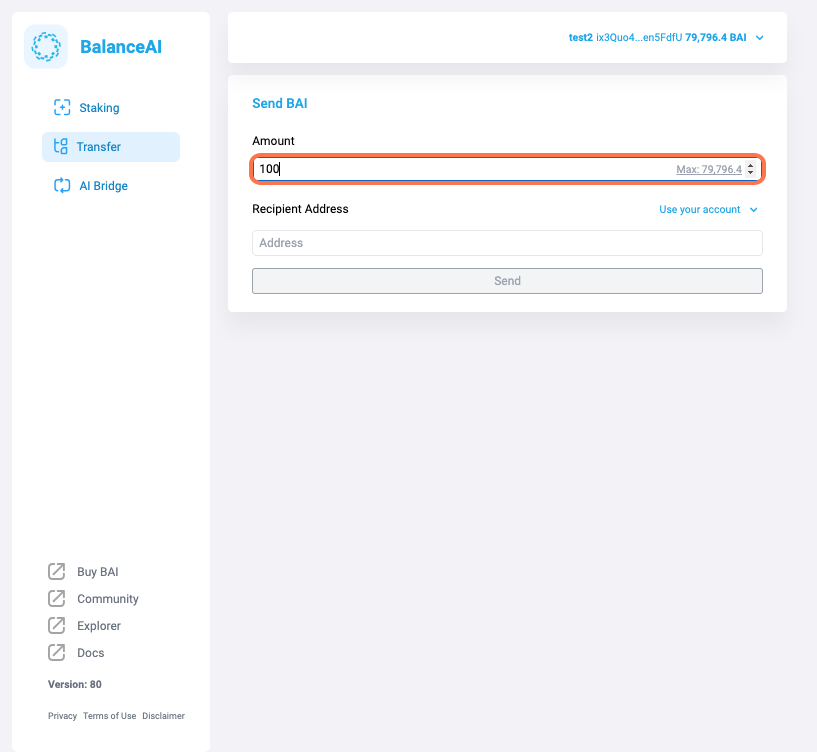
3. Verify your connection. The address should be visible once selected.

4. Enter the amount in the input field.
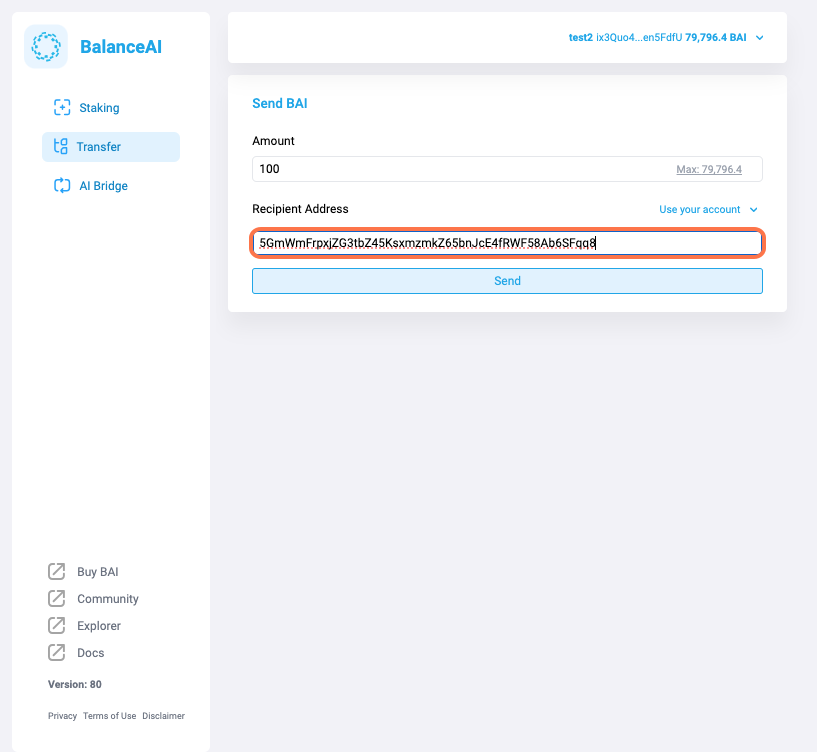
5. Enter the recipient's address in the input field.
6. Click on "Send."
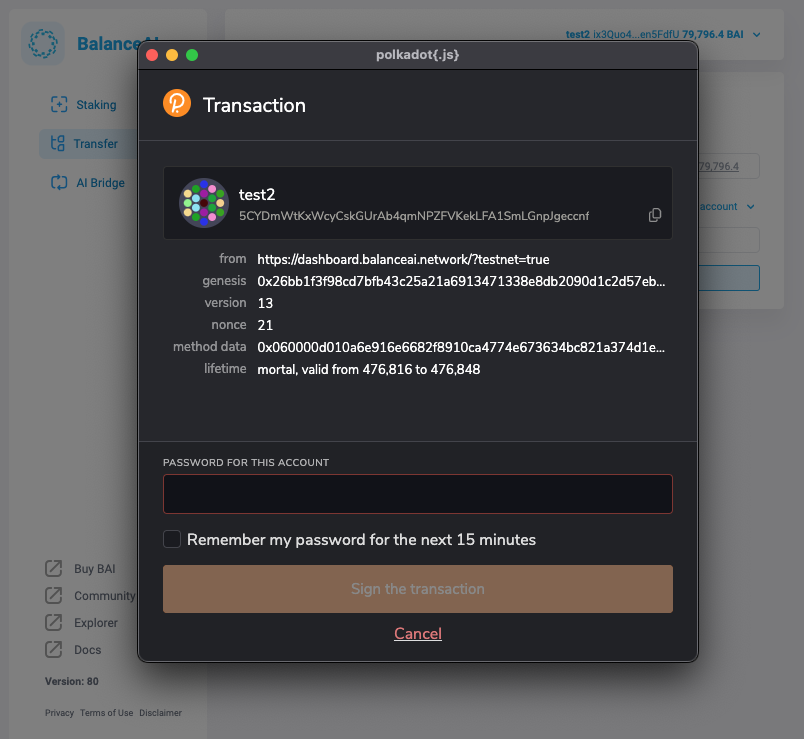
7. Sign the transaction on your wallet.
8. A transaction status pop-up will appear.
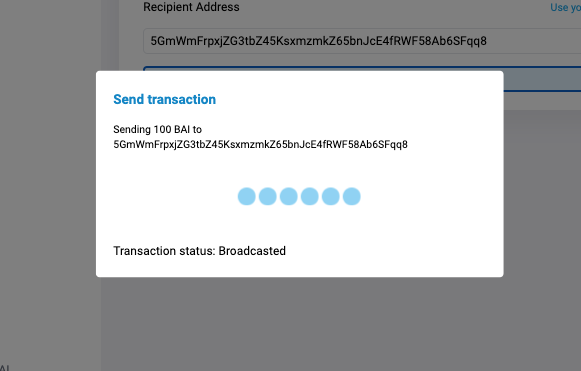
9. Once the transaction is successful, you can close the window.

Created with Tango.us